Congrats for taking the first step to enhance conversions on your site!
Let’s install Social Proofy on your Zoho site.
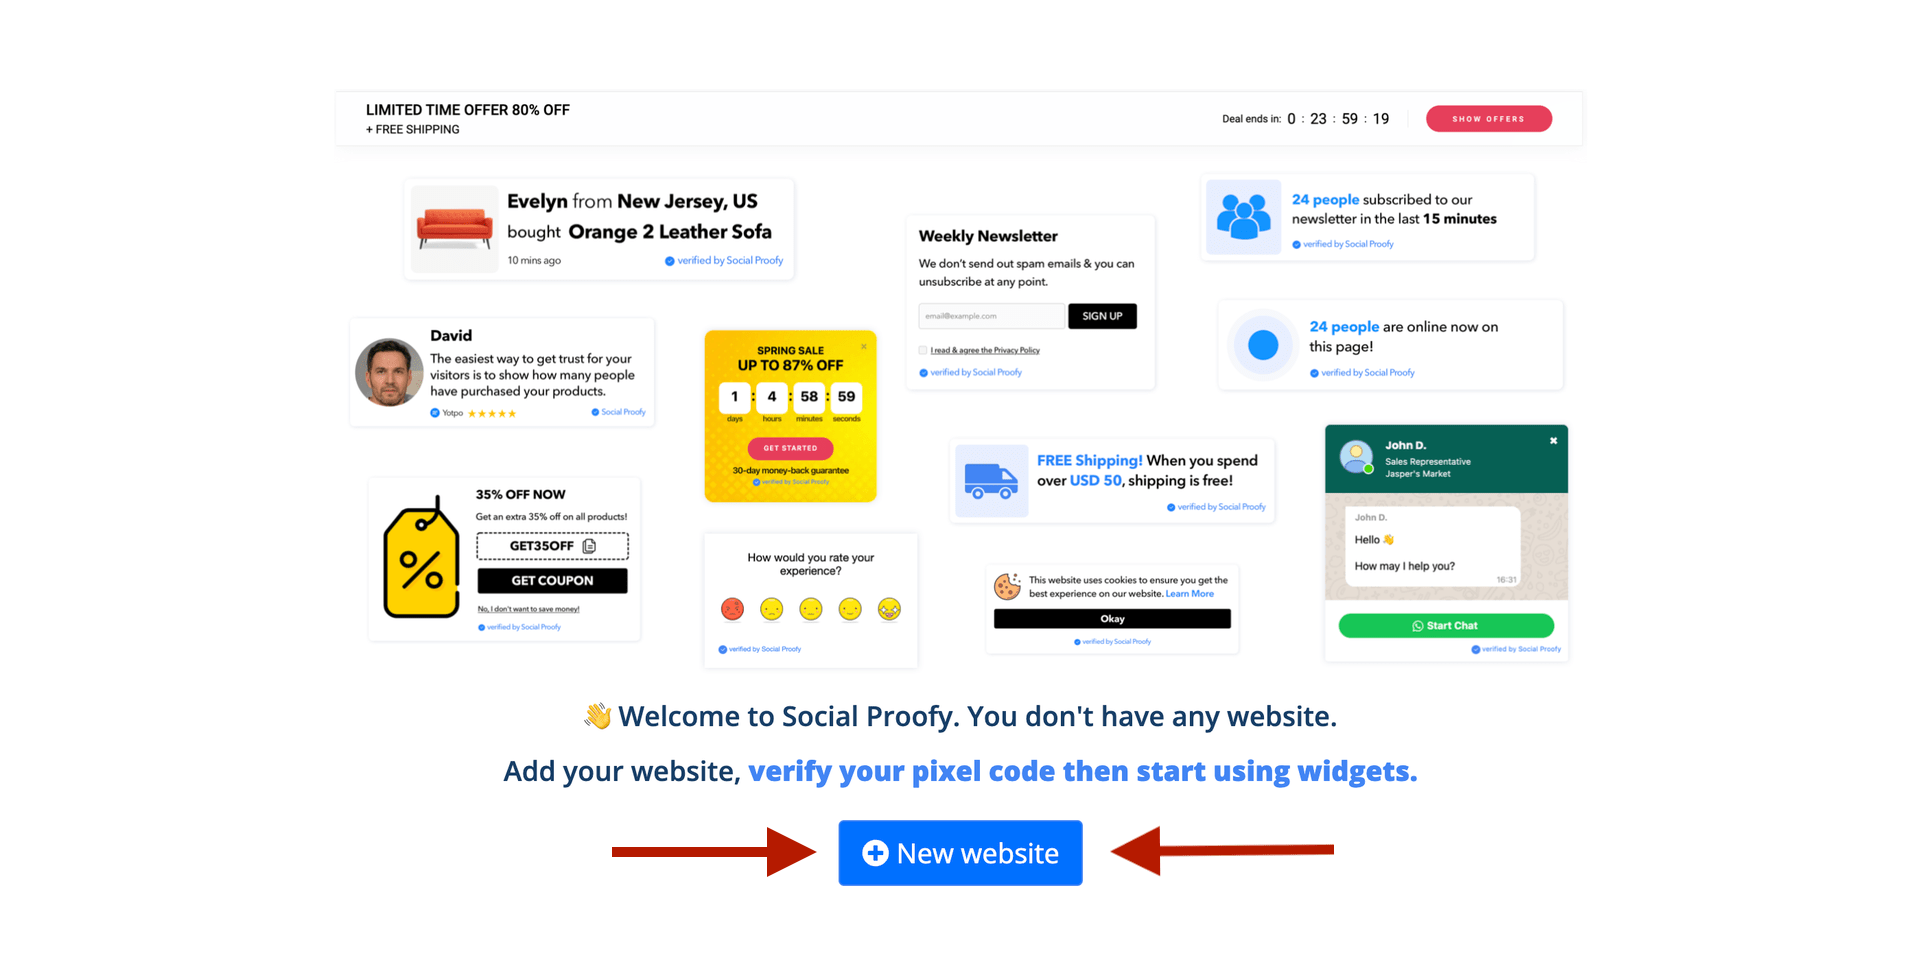
Part 1 – Add your site on Social Proofy
Step 1- Log in to your Social Proofy account, click on the button that says New Website and register your site.
Step 2 – After adding your site, go to the top left corner of your Dashboard and click on the Red Dot next to “Pixel not active”.
![]()
Step 3 – Select the “Add to your HTML” option.
![]()
Step 4 – Copy the code snippet. You’ll need this later.
![]()
Part 2 – Activate your Pixel
Step 1 – Log in to you Zoho account.
Step 2 – Select Sites.

Step 3 – Select your Site.

Step 4 – From the side bar, click on Customization > Code.

Step 5 – Under the Header code tab paste the code you copied from Part 1 Step 4 then press Save and Publish.

Step 6 – Go back to your Social Proofy Dashboard and click on the Red Dot next to “Pixel not active”, once again.
![]()
Step 7 – Once there, click on the Verify Pixel button.
![]()
If it shows Green, you’re all set. You have successfully installed the Social Proofy Pixel on your site.
![]()
The code will be added to all pages on your site and Social Proofy will start working.
If it does not show green? Click the chat bubble in the app so we can assist you 1-on-1 setting up your Pixel.
Now that you’ve added Social Proofy to your site, the fun part starts!
Part 3 – Zoho Webhook Integration
If you want to submit Zoho Form data via Webhook, these articles can be helpful.
Social Proofy Webhook Integration